

Google Tag Manager is a useful option for managing your website tracking tags. Cog’s Digital Strategist Nazma Noor explains more about the basics including some top-tips and common mistakes we’ve seen across the arts and culture sector.
Google Tag Manager basics, top tips and common mistakes

What is Google Tag Manager?
Let me start by giving a definition to the word ‘tags’, in this context.
Tags are short snippets of code, invisibly embedded within website pages. They can contain pixels (links to other websites) or more complex (Javascript) code and functions such as writing data to a cookie.
Across arts and cultural organisations the most frequently used tags (sometimes called ‘tracking pixels’) we’ve come across tend to be tags which give you the ability to track user behaviour on your website.
Many people will use the words ‘pixels’ and ‘tags’ interchangeably and that’s OK, if not strictly true.
Tag Manager is a ‘free’ tool from Google that allows you to remotely add, remove or edit multiple tags/pixels within your website.
For any websites that are not using Tag Manager, you would need to individually add each tag/pixel to the code of the specific pages, and manually update the code when you need to. But once you (or more likely your web developers) have installed Google Tag Manager, you can do all of that within the Tag Manager platform without having to touch the website’s code.
 Google Tag Manager is a container which allows you to manage and organise your tracking tags
One analogy I like to use when explaining it is to imagine your website is a house. The code is like the walls of the house. Every time you add a new tracking tag code you have to repaint the whole wall. Google Tag Manager is an alternative like having a digital picture frame in each room where you add your tracking tags.
Remotely updating the tags in the digital picture frame (Google Tag Manager) means you don’t have to keep repainting all the walls (code) of your house (website).
Google Tag Manager is a container not a display
Google uses the term ‘container’ to refer to each individual Google Tag Manager account.
Google Tag Manager doesn’t display the live data from your tags/pixels, it’s just the ‘container’ where they are set-up and added to the website.
To access the data from those tags, you need to log into the specific platform for each tag.
For example you would log into Meta Business Manager to view a Meta/Facebook tag/pixel, or Google Analytics to view the data from your Google tag.
However in ‘Preview’ mode you can test whether your tags are recording the correct data and interactions before you set them live.
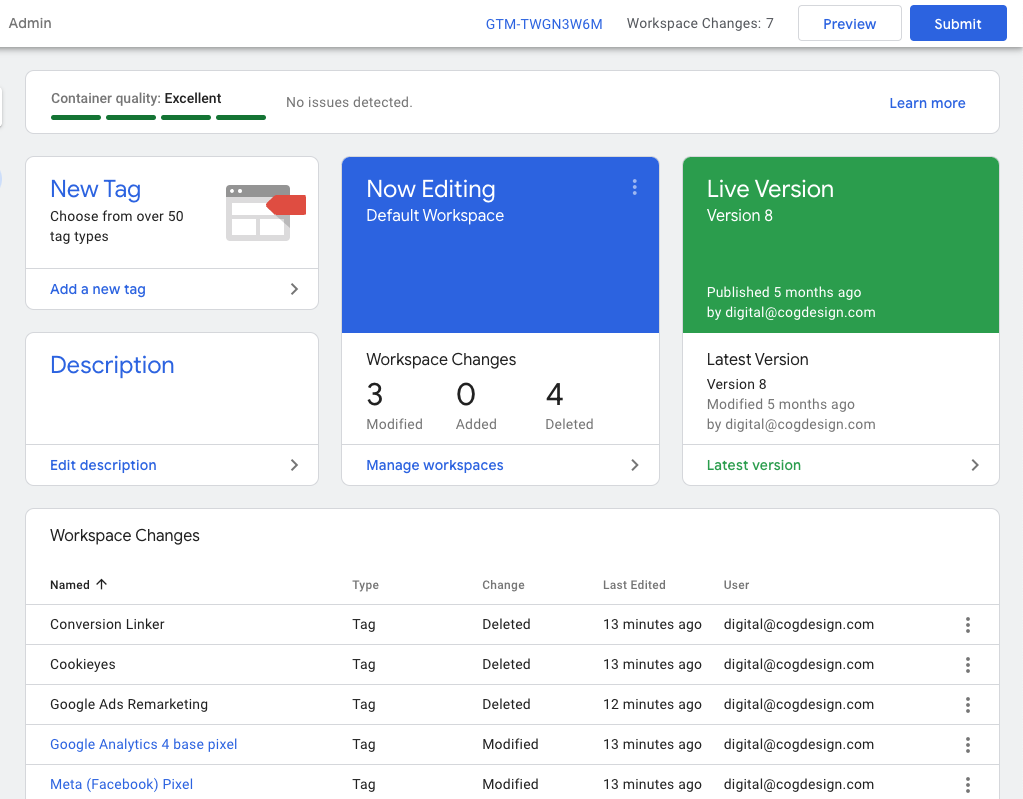
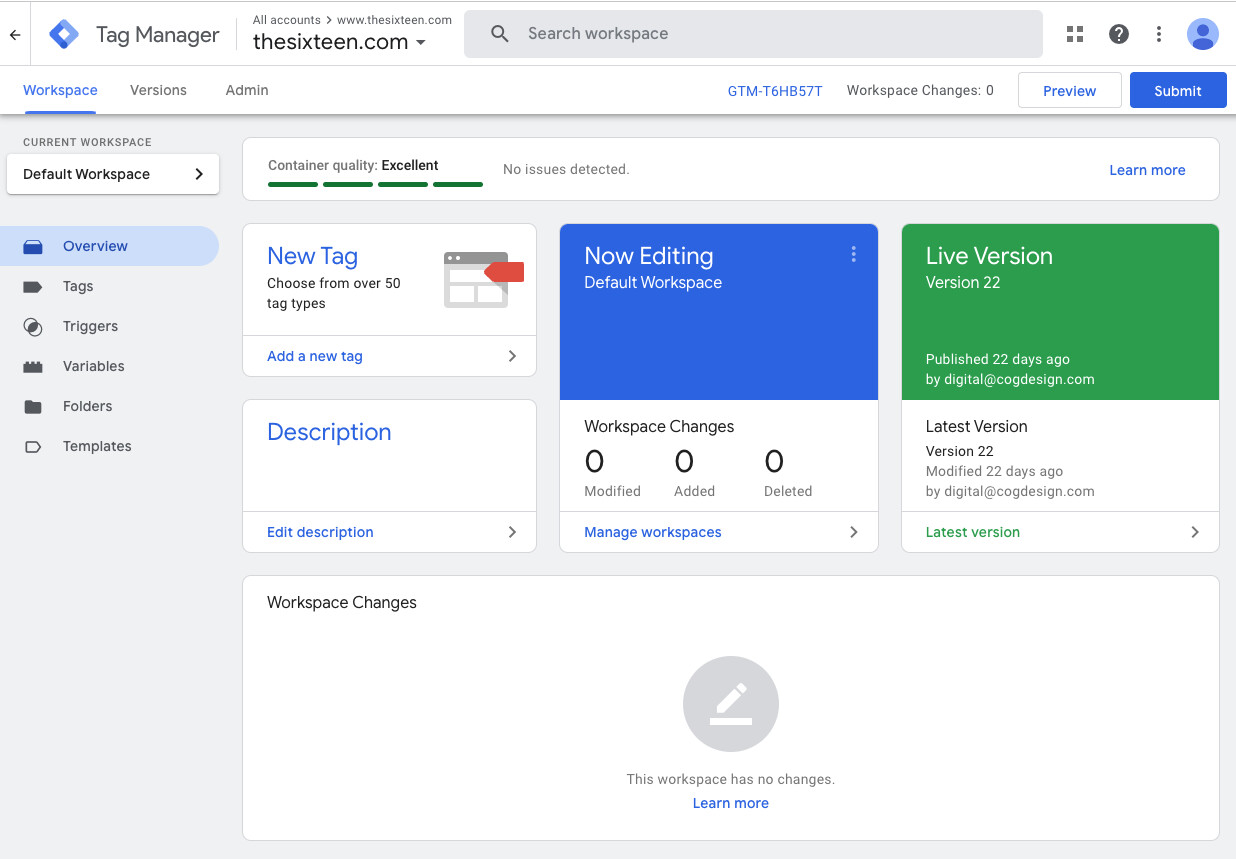 The "Overview" screen you see when you first log in to Google Tag Manager
Google Tag Manager basic lexicon
Here’s an explanation of the basic things you will find when you log in to your Google Tag Manager container.
Workspaces
A workspace is the testing area that Google Tag Manager provides for you to add, remove and edit your tracking tags. Then when you’re happy with how they’re working in the test space, you click the ‘Submit’ button to publish the workspace and make it live – meaning your tracking tags will now be active on the website.
Google Tag Manager labels your main workspace the ‘Default Workspace’.
In most cases, this one workspace is perfectly sufficient. But there is also the option to create extra workspaces for more advanced uses, for instance if you are adding different tags that need to go live at different times.
As an example, I’ve recently been setting up cookie compliance tags for our clients – I’ll usually set up a separate ‘Cookies’ workspace so I can conduct detailed my testing on these tags. In the meantime, I can continue to add any other pixels (for instance, a new Meta pixel) to the Default Workspace and set them live.
Tags
The ‘Tags’ section in Google Tag Manager is where you can see a list of all the tags/pixels in your container, including those which haven’t been published yet and any which have been paused.
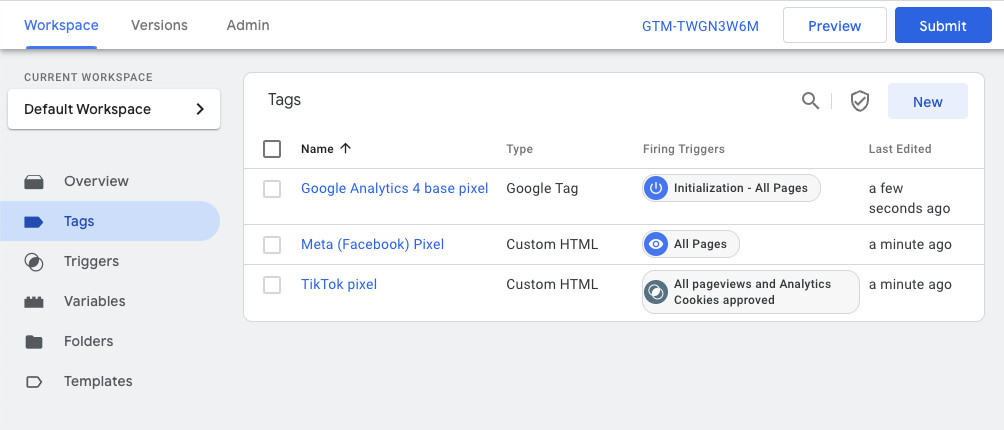 List of tags in Google Tag Manager
Triggers
Each Tag must have a ‘Trigger’.
The trigger tells the tag when to do what it’s been set up for, if we’re using Google’s terminology, when to ‘fire’.
Google Tag Manager has a set of default triggers: ‘All Pages – Page View’ is the main one. Selecting this trigger means your tag will fire on all pages every time the page is viewed.
You’ll need to set up custom triggers for more specific tracking tags.
For example if you want to track sales conversions, you’ll want to set up a trigger to only fire when a user has viewed your booking confirmation page.
Another very common custom trigger set up is to make sure your analytics tracking tags only fire when a user has accepted analytics tracking cookies.
Variables
A variable is the specific information you want to track/record when the tag is fired.
Google Tag Manager has a set of ‘Built-in Variables’ which includes things like ‘Page URL’ and ‘Click Text’.
In some instances it can be useful to add your own variables to track further information.
For example if you’re tracking sales from your website and want the sales data to appear in your Google Analytics reports, you can set up variables for ‘product name’, ‘product category’. ‘value’, ‘quantity’ etc.
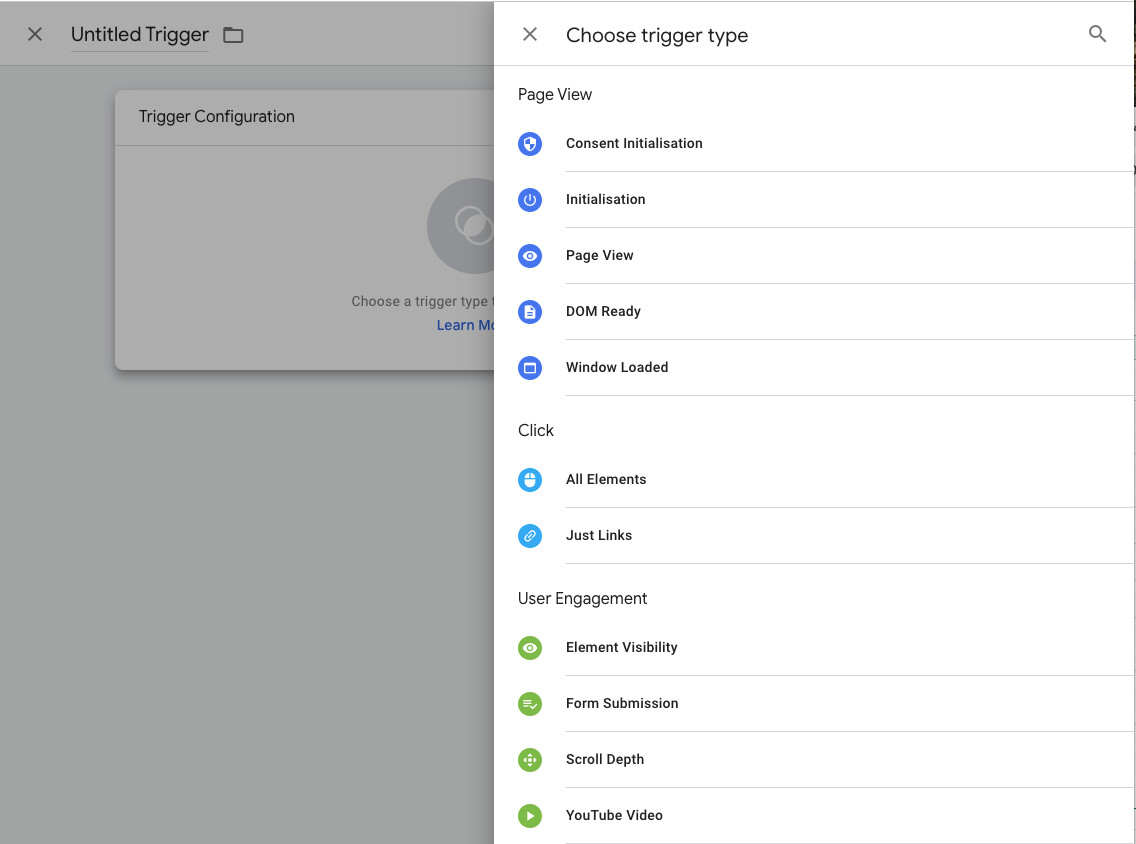 The default triggers that Google Tag Manager comes with as standard
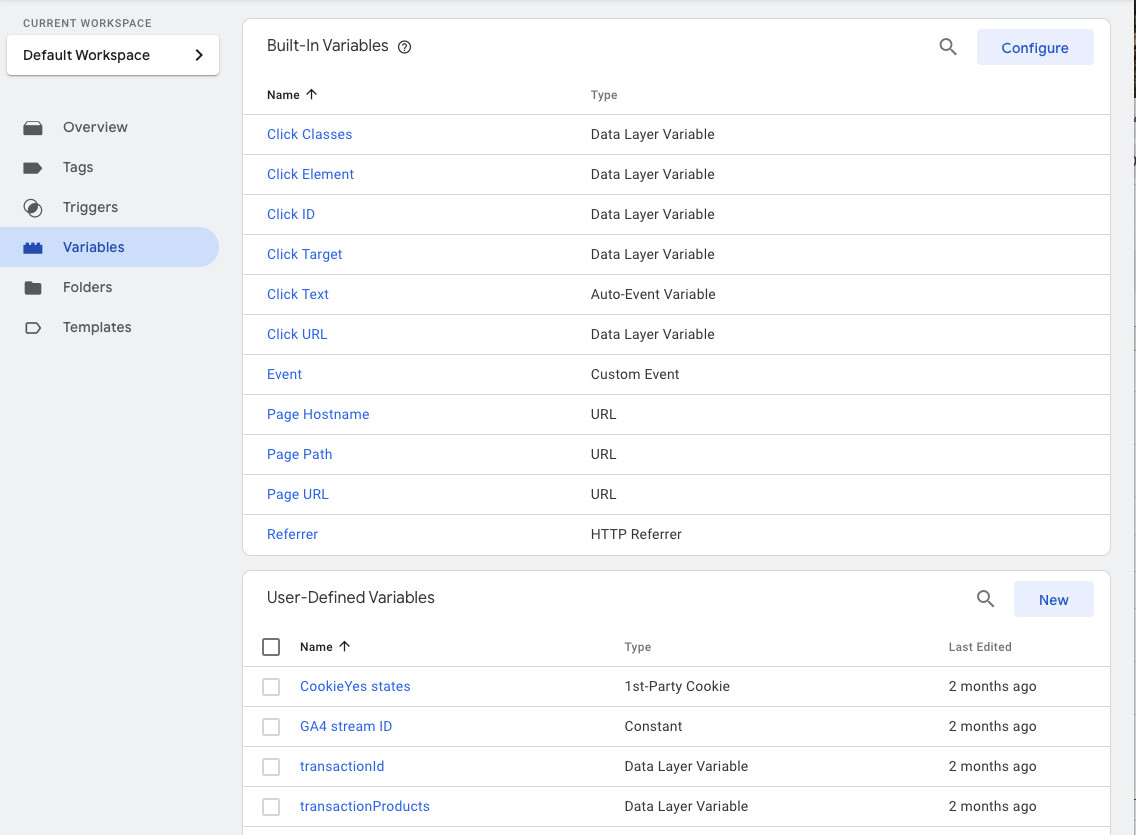 A list of the variables including the "built-in" variables and some custom variables to track sales information
Tags, triggers and variables
Here’s a quick recap of the tag setup basics:
A tag is a snippet of code that is usually used for tracking website activity.
A trigger tells the tag when to fire.
A variable is the specific information you want to track when the tag is fired.
Google Tag Manager top-tips and common mistakes
At Cog, we look after 70+ websites so we’ve amassed quite a lot of experience. Here are some of our top-tips and the common mistakes we’ve learned to avoid.
Common mistake – making changes and not publishing them
One of the easiest mistakes to make is to add your tags and relevant triggers but not actually publish them. You have to remember to click the “Submit” button to make your new tags and any changes live.
If you’re not sure if you have unpublished changed, you’ll be able to see that this in the ‘Workspace Changes’ area on the Overview screen.
Common mistake – duplicate tags
If you’re switching to Google Tag Manager, having previously had tags directly added into the code of your website (or on the walls of your house in my analogy), remember to remove those old tags before you add them to Google Tag Manager.
If you don’t, you’ll be doubling up on the data you record, and the process will slow down your site.
Common mistake – forgetting to add Google Tag Manager code to any iframes or external pages connected to your website.
This is especially relevant if you use a separate system for ticketing or other sales (even if those systems are embedded in your site using iframes). You need to add the Google Tag Manager container code onto your external systems / iframes otherwise you won’t be able to track the activity happening on those pages.
Tip – write notes for future you
Google Tag Manager has areas where you can save notes about the changes you’re making. It’s good practice to add a relevant ‘Version Name’ and ‘Version Description’ every time you publish your Google Tag Manager container. This means you have a record of what was done and why and future you (or anyone else who will be updating the container in future) will be thankful for those notes.
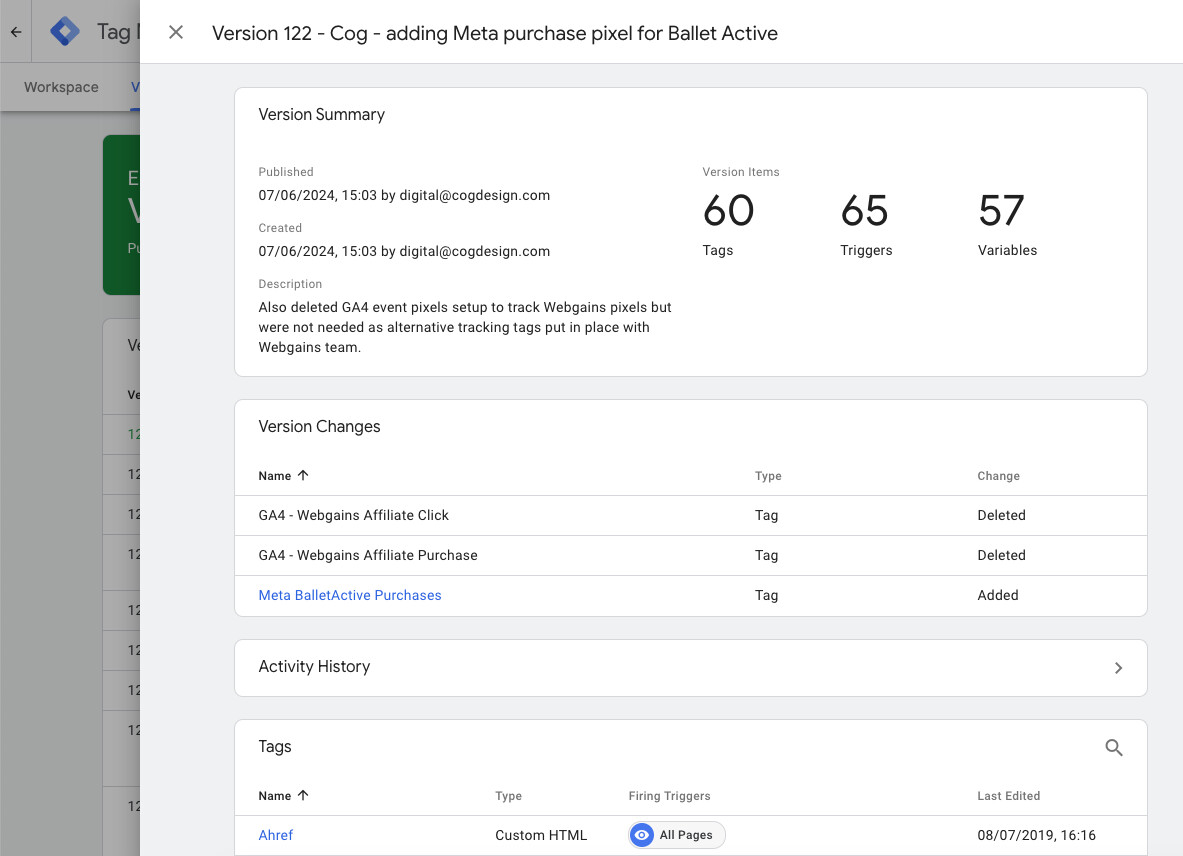 An example of useful notes to include when you're making updates
Tip – check if the tag you’re adding has a pre-built template
One of the other benefits of using Google Tag Manager is the ever-growing set of ‘tag templates’.
These tag templates are created by web developers to make it easier for you to add your tags. They’re like a shortcut to the tag setup process and they’re useful if you’re not as experienced with tracking tags as they often have simple entry boxes for you to fill in and tick boxes.
Many well-established tracking and advertising platforms (like TikTok, Meta, Hotjar and Quantcast) have invested in creating tag templates. When you’re adding a new tag, all you have to do is search the tag templates gallery to see if there is a template available.
Related tip – check that the pre-built template is current and legitimate
It’s worth checking and verifying the creator of the tag template you’ve chosen; click on their name to view more about the creator. Look for ‘official’ templates from the company who is providing the pixel.
It’s also useful to check the ‘last updated’ date on the tag template and being conscious of any tag templates that haven’t been updated in the last 18 months.
I found there is a “Facebook Pixel” tag template that was last updated on 30+ months ago, and the creator states that the ‘facebookarchive’ projects have been archived and are generally unsupported. So I wouldn’t use that one. In contrast the ‘TikTok Pixel’ tag template is only a month or two old so that is a good one to use.
Tip – delete any tags that are not in use
A bit of basic housekeeping is always a good investment of time.
The process of firing tags does take time and if you have many tags it will slow down your site which makes for a poor user experience. And if your site performs slowly then that will also affect your Search Engine Optimisation (SEO) rankings.
We’d recommend reviewing your tags every few months and deleting or pausing any tags that aren’t in use.
Pause any tags which you may want to switch on again in the future and delete any which you know you won’t need, for example tags which are specific to an event which has now finished.
What to do next
I’ve covered the basics of Google Tag Manager but of course there’s lots more to delve into and take advantage of.
Adding and updating tags, and auditing Google Tag Manager, is something I do regularly for Cog clients. If you’re not a Cog client then it’s worth checking in with whoever manages your website to see if you have Google Tag Manager set up and to check you’re not making any of the common mistakes I’ve covered.
If you’re looking to expand your personal knowledge of Google Tag Manager and have time for some in depth learning, I’d recommend starting with this guide from Julius Fedorovicius at Analytics Mania Google Tag Manager Tutorial for Beginners.
Related

Five tips for website analytics using GA4
Nazma shares 5 of her top tips to take your website reporting into 2024 using Google Analytics and their GA4...

SEO Resources – Arts Marketing Association Digital Day 2023
Cog's Digital Strategist, Nazma Noor, has put together some useful links and resources to accompany her SEO talk at the...

12 July ’24
Nazma's working through her Tony's Chocolonely & 'Everyday Cog' prize and doing Cookie compliance setups.

5 July ’24
Nick, Nazma and Jo are ready for Day 2 at the AMA conference.
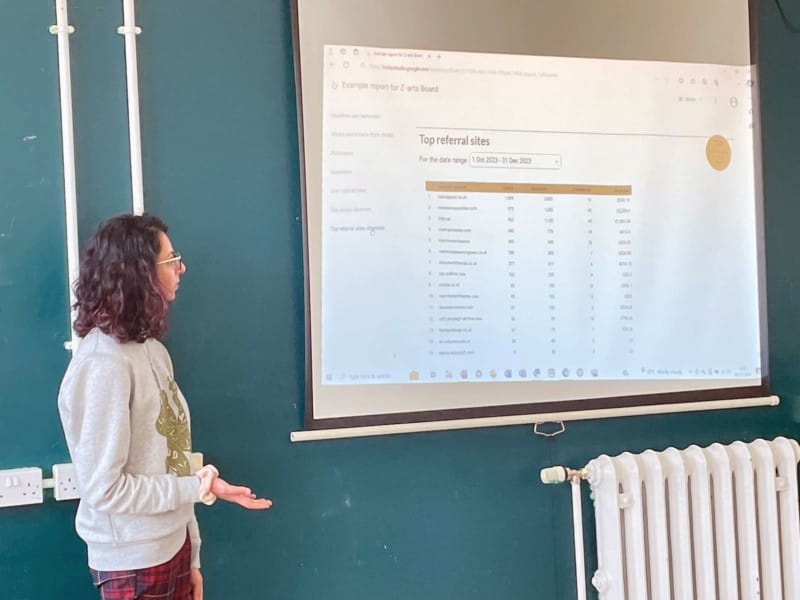
27 March ’24
At the Z-arts Board Away Day, Nazma shared the website analytics dashboard we created for them.